Quality control efforts

In order to ensure thorough quality control, we have set up a quality assurance section and carry out strict checks. We only ship products that have passed the strict checks.
We strive to improve and strengthen the quality of products and the check system, and in order to continue to provide the best products to our customers, we take all possible measures for quality control and quality assurance until delivery, and perform quality checks from all angles. We are here.

Production-in-process inspection
First of all, when the product is completed, the person in charge of production checks the dimensions, appearance, etc. based on the appearance inspection report.

Visual inspection (visual inspection)
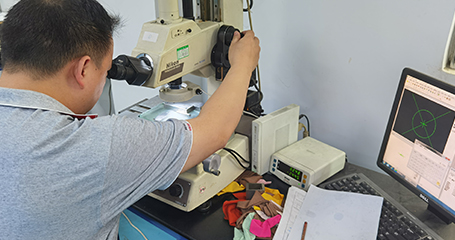
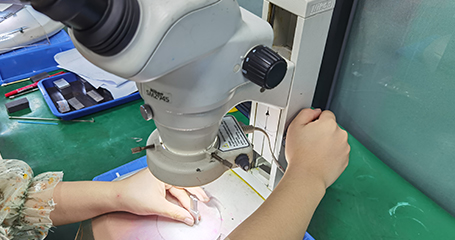
Products that have passed the Quality Assurance Division are visually inspected or visually inspected using a microscopic measuring instrument, depending on their size and accuracy.
Quality control equipment
We strive to improve and strengthen the quality of products and the check system, and in order to continue to provide the best products to our customers, we take all possible measures for quality control and quality assurance until delivery, and perform quality checks from all angles. We are here.
| Device name | Manufacture name | Machine type | Number of units |
| Plane grinding | SHUGUANG | SGM | 16 |
| Electric discharge machine | Makino Milling Machine | EDGE3i | 2 |
| Sodick | AD32LS | 4 | |
| Sodick | AD30LS | 2 | |
| Wire electric discharge machine | Sodick | AQ400LS | 4 |
| SEIBU | M50B | 1 | |
| Machining center | Makino Milling Machine | F3 | 1 |
| Taiwan Shinzen | 6SDF | 1 | |
| TAKISAWA | NEX-108 | 1 | |
| DOOSAN | PUMA215II | 1 | |
| Automatic image measuring instrument (three-dimensional) | HEXAGON | GLOBAL PLUS | 1 |
| Image measuring instrument (two-dimensional) | Manmoat | VMS-2010G | 1 |
| Projector | Nikon | V-12B | 3 |
| Tool microscope | Nikon | MM-22 | 2 |
| Stereomicroscope | OLYMPUS | SZ61 | 2 |
| Nikon | SMZ745 | 2 | |
| Hardness tester | Mr. Raku | HR-150A | 1 |
| Altimeter | Nikon | MS-31G | Five |
| Pin gauge | 1 | ||
| Block gauge carbide | mitutoyo | 1 |


 :matsuyama@yinghai-m.com

